Skip to content
Instructions:
- Preheat the oven to 350°F (175°C) and line a large rimmed baking sheet with heavy-duty aluminum foil or oven-safe parchment paper, extending it up the sides. Lightly grease the lining to ensure the toffee releases easily once set.
- Arrange the salted saltine crackers in a single, tightly packed layer across the lined baking sheet, placing them edge to edge without overlapping for an even base.
- In a medium, heavy-bottomed saucepan, combine the unsalted butter and packed light brown sugar. Heat over medium heat, stirring frequently until the butter fully melts and the sugar dissolves into a smooth mixture.
- Bring the mixture to a steady, bubbling boil, then reduce the heat slightly if needed and continue cooking for 3 minutes, stirring gently and consistently. The caramel should thicken, turn glossy, and develop a rich golden amber hue—this step is key to achieving the proper toffee texture.
- Remove the saucepan from heat immediately and carefully pour the hot caramel evenly over the saltine crackers. Use a heat-resistant spatula to spread the caramel gently but thoroughly, coating every cracker.
- Place the baking sheet in the preheated oven and bake for about 5 minutes, until the caramel bubbles vigorously across the surface, ensuring even cooking and spreading.
- Remove the baking sheet from the oven and set it on a heatproof surface. While the caramel is still very hot, sprinkle the semisweet chocolate chips evenly over the top.
- Let the chocolate chips sit undisturbed for 2 to 3 minutes to soften from the residual heat. If needed, briefly return the tray to the turned-off warm oven to help the chocolate soften without melting too much.
- Using an offset spatula or the back of a spoon, spread the softened chocolate into a smooth, thick, even layer across the entire caramel surface.
- Allow the candy to cool at room temperature for 15 to 20 minutes, then refrigerate it for 45 to 60 minutes, or until both the chocolate and caramel are completely firm.
- Once set, carefully lift the toffee from the baking sheet by the foil or parchment lining and peel away the lining.
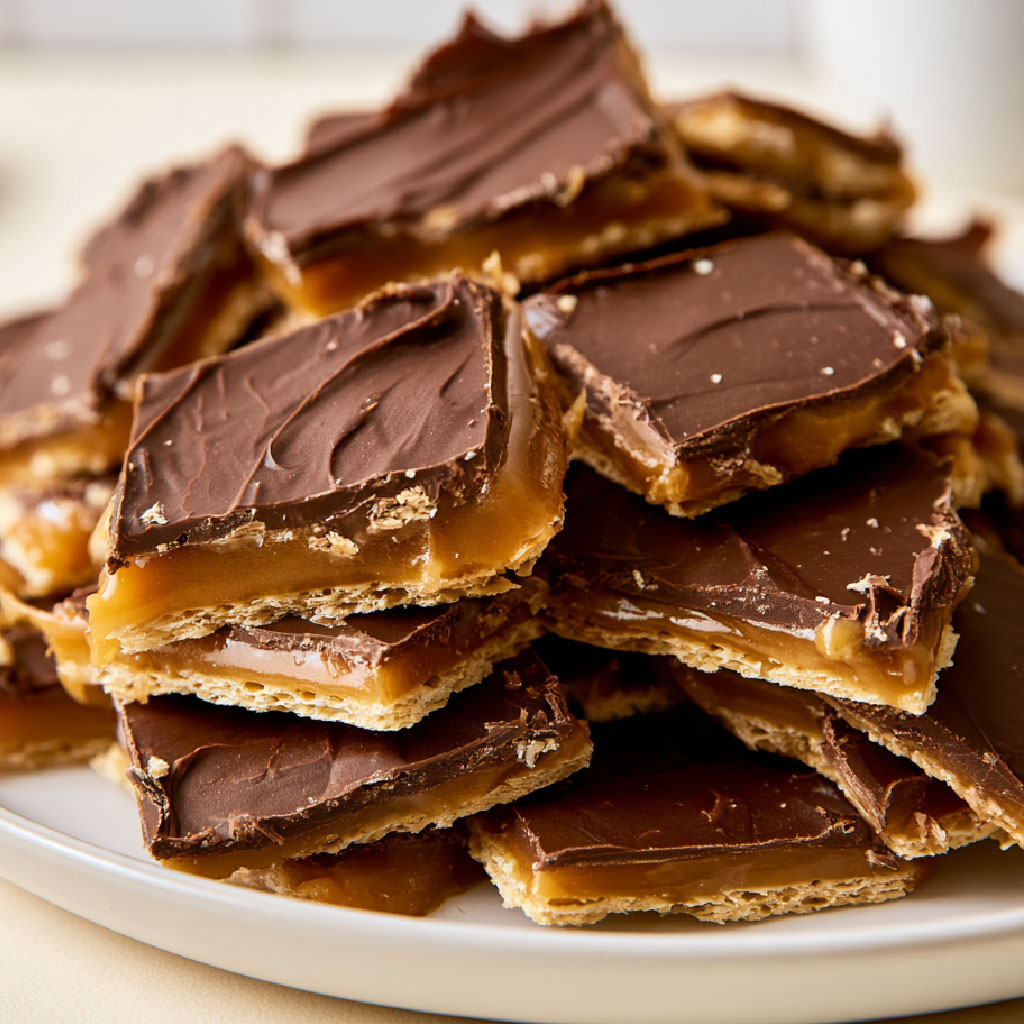
- Break the Christmas Crack into roughly 24 irregular pieces by hand, revealing the beautiful layers of crisp saltine crackers, golden caramel, and rich chocolate.
- Arrange the pieces on a serving platter or package them in festive tins for gifting.
Variations
- Swap semisweet chocolate chips for white chocolate chips to make a sweeter, creamier version.
- Use dark chocolate and sprinkle flaky sea salt on top for a sophisticated sweet-and-salty twist.
- Add crushed peppermint candies over the melted chocolate before it sets for a festive, minty crunch.
- Scatter finely chopped toasted pecans on the chocolate layer for added texture and nutty flavor.
- Mix small spoonfuls of creamy peanut butter into the softened chocolate before spreading to create a rich peanut butter chocolate crack.
- Decorate the melted chocolate with red and green holiday sprinkles for a fun and festive look.
Tips
- Always use salted saltine crackers to achieve the perfect balance of sweet and salty flavors.
- A rimmed baking sheet is essential to prevent hot caramel from spilling over the edges during baking.
- Be careful not to overlap the crackers; this ensures even caramel coverage and consistent texture.
- Choose real unsalted butter over margarine for superior flavor and toffee consistency.
- Watch the caramel closely once it starts boiling to avoid burning or undercooking, which can affect texture.
- Spread the chocolate only after it has softened from the heat, but before the caramel cools completely for a smooth finish.
- Store the finished Christmas crack in an airtight container in a cool, dry place for up to 5–7 days; refrigerate if your kitchen is warm to keep the chocolate firm.
- For longer storage, refrigerate up to 2 weeks or freeze in an airtight container for up to 2 months, placing parchment paper between layers to prevent sticking.
- When freezing, thaw the candy inside its sealed container to minimize condensation and preserve the chocolate’s glossy appearance.