Skip to content
Instructions:
- Heat 1 tablespoon olive oil in a large heavy-bottomed Dutch oven over medium-high heat until hot but not smoking.
- Add half the ground beef in an even layer and cook undisturbed for 2 minutes to develop browned edges, then break into crumbles and cook until mostly browned.
- Transfer the browned beef to a plate using a slotted spoon.
- Repeat the browning process with the remaining ground beef, ensuring it reaches an internal temperature of 160°F (71°C), then transfer to the plate with the first batch.
- Carefully drain excess fat from the pot, leaving about 1 tablespoon of beef drippings.
- Reduce heat to medium, add the remaining 1 tablespoon olive oil, then add diced onion and stir to coat in the oil and drippings.
- Cook the onion for about 3 minutes until softened and translucent.
- Add diced green and red bell peppers, stirring to combine, and cook for 4–5 minutes until peppers soften but retain some firmness.
- Stir in minced jalapeño and cook for 1 minute, then add minced garlic and cook another 30–60 seconds, taking care not to burn the garlic.
- Mix in 3 tablespoons tomato paste and cook for 1–2 minutes until it darkens and releases a savory aroma.
- Sprinkle the chili spice blend over the vegetables and toast for 30–45 seconds, stirring continuously to release the spices’ aromas without scorching.
- Return the browned ground beef to the pot and stir gently to coat with the tomato paste and spices.
- Add the two cans of fire-roasted diced tomatoes with their juices, the can of tomato sauce, and stir to combine.
- Pour in 1½ cups low-sodium beef broth and scrape the bottom of the pot with a wooden spoon to incorporate browned bits.
- Stir in Worcestershire sauce, brown sugar, and unsweetened cocoa powder until the cocoa dissolves, adding subtle depth without sweetness.
- Season with kosher salt and freshly ground black pepper, then stir well to distribute the flavors.
- Bring the mixture to a gentle boil over medium-high heat, then immediately reduce heat to low and simmer uncovered for 40 minutes, stirring every 8–10 minutes to prevent sticking and encourage thickening.
- If the chili thickens too much, add a splash of warm beef broth sparingly to maintain a hearty, thick consistency without becoming soupy.
- Stir in the drained kidney and pinto beans gently to keep them intact, then continue simmering uncovered for another 20–25 minutes, stirring occasionally to prevent sticking.
- If desired, mash about ¼ cup of beans against the pot’s side and stir them back in to naturally thicken the chili with released starch.
- Stir in apple cider vinegar to brighten the complex flavors, then taste and adjust seasoning with salt, pepper, brown sugar, cayenne pepper, or cumin as needed.
- Remove the pot from heat and let the chili rest for 5–10 minutes to allow flavors to meld and the sauce to thicken slightly.
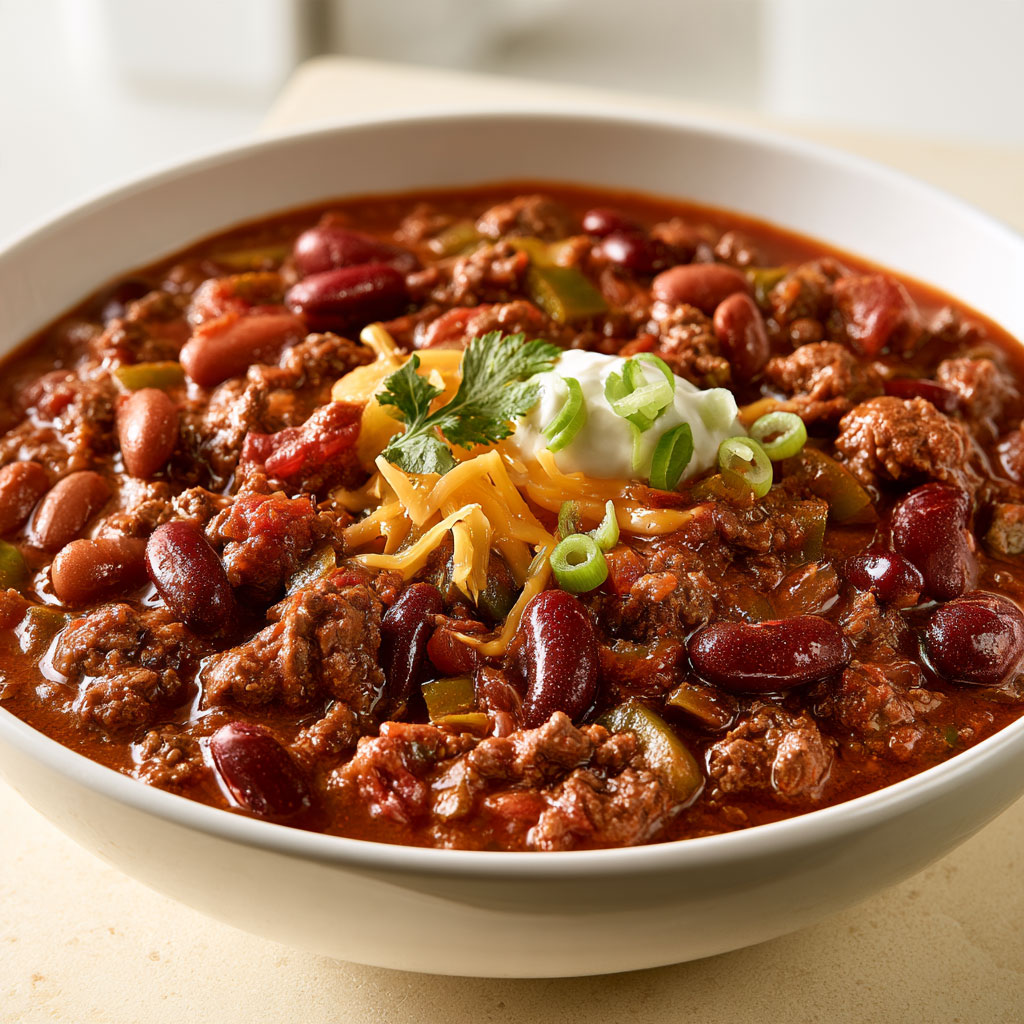
- Serve hot, garnished with optional toppings like shredded cheddar, sour cream, sliced green onions, chopped cilantro, and jalapeño slices, alongside cornbread or crackers.
Variations
- Omit beans entirely for a traditional Texas-style chili that is more meat-forward and thicker.
- Swap ground beef for ground turkey or chicken for a lighter, leaner chili.
- Add smoked brisket or sausage pieces for an extra smoky, hearty flavor.
- Include black beans or chickpeas instead of kidney and pinto beans for a different texture and taste.
- Use fire-roasted tomatoes with green chilies instead of plain fire-roasted tomatoes for a spicier version.
- Increase cayenne pepper and jalapeño amounts for a hotter chili, or reduce them for milder heat.
Tips
- Brown the ground beef in batches to ensure proper caramelization, which builds richer flavor.
- Simmer uncovered to allow the sauce to thicken naturally without needing thickeners like flour or cornstarch.
- Store leftover chili in airtight containers in the refrigerator for up to 3–4 days; flavor often improves after a day.
- Reheat gently over medium-low heat with a splash of beef broth if it has thickened too much; avoid boiling to keep beans intact.
- Chili freezes well when cooled and stored in freezer-safe containers with headspace for expansion; consume within 2–3 months for best quality.
- Thaw frozen chili overnight in the refrigerator and reheat thoroughly before serving.
- Keep toppings like cheese, sour cream, and fresh herbs separate until serving to maintain freshness and texture.