Skip to content
Instructions:
- Heat a large skillet over medium-high heat and brown the ground beef, breaking it into small pieces until fully cooked, about 5 to 7 minutes. Browning first develops richer flavor and improves texture in the final dish.
- Add the finely diced onion to the skillet and cook for 3 to 4 minutes until softened and translucent. Stir in the minced garlic and cook for an additional 30 seconds until fragrant, which enhances the overall aroma and taste.
- Drain any excess grease from the skillet to avoid making the chili mac too oily, leaving the savory beef and softened vegetables behind.
- Transfer the cooked beef mixture to your 5- to 6-quart slow cooker. Add the drained kidney beans, tomato sauce, diced tomatoes with their juices, and 1½ cups of beef broth, which will provide moisture and deepen the chili’s flavor.
- Sprinkle in the chili powder, ground cumin, smoked paprika, dried oregano, garlic powder, kosher salt, and freshly ground black pepper. Stir thoroughly to evenly distribute the spices for balanced seasoning.
- Cover the slow cooker and cook on LOW for 4 to 5 hours. This slow simmer allows the flavors to meld and intensify, creating a rich, hearty chili base.
- About 25 to 35 minutes before serving, switch the slow cooker setting to HIGH. Stir the chili, then add the uncooked elbow macaroni. This timing prevents the pasta from overcooking and becoming mushy.
- Pour in the remaining ½ cup of beef broth and stir well, making sure the macaroni is coated and mostly submerged in the liquid. If needed, add a splash more broth to keep the pasta moist as it cooks.
- Cover and continue cooking on HIGH for 20 to 30 minutes, stirring once or twice. Begin checking the pasta at 15 minutes to avoid overcooking, as slow cooker times can vary.
- Once the macaroni is tender but still holds its shape, reduce the slow cooker to LOW or WARM. Stir in 1 cup of shredded sharp cheddar cheese until fully melted, creating a creamy, cheesy texture that binds the chili and pasta together.
- Sprinkle the remaining ½ cup of cheddar cheese evenly over the top. Cover and let it melt for another 3 to 5 minutes, forming a golden, melted cheese layer on the surface.
- Remove the lid and let the chili mac rest uncovered for about 5 minutes. This resting time allows the pasta to absorb extra liquid, thickening the dish to the perfect hearty consistency.
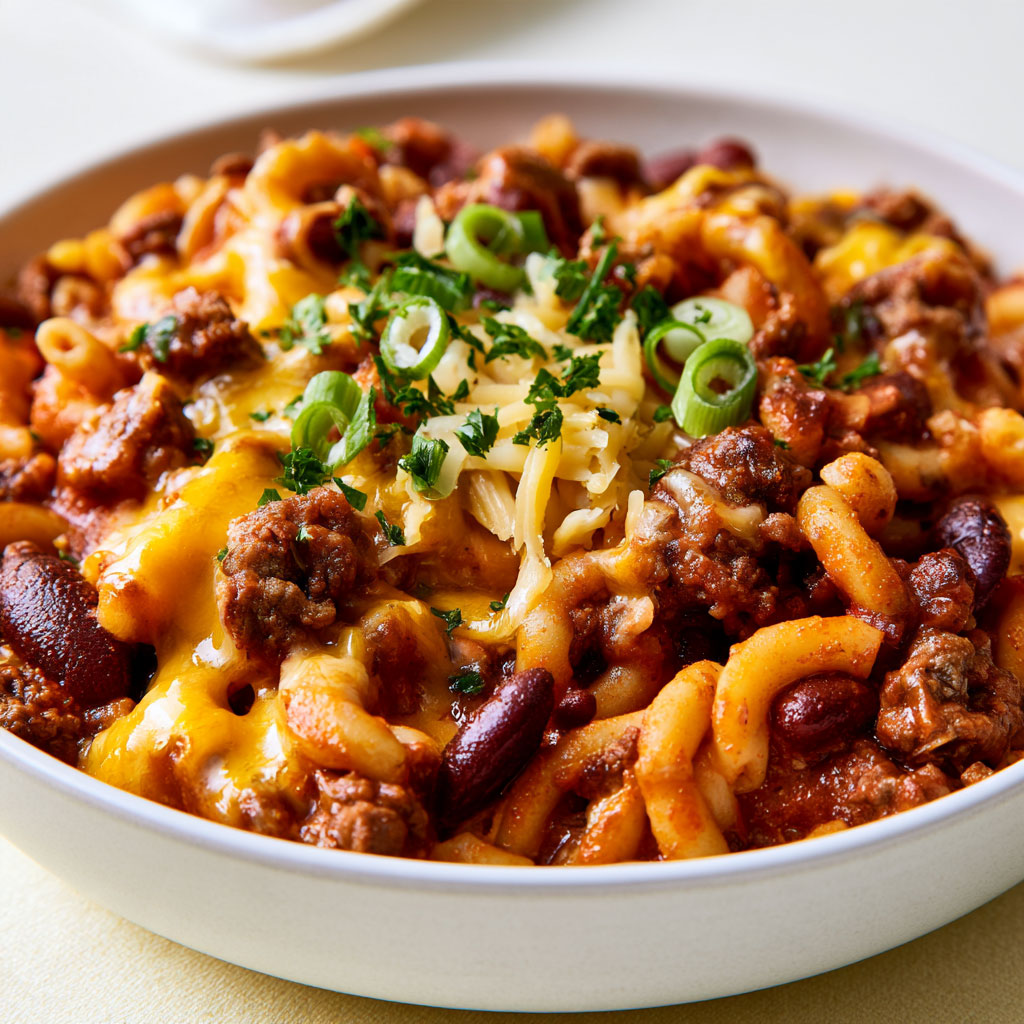
- Spoon generous portions into deep bowls, making sure each serving has plenty of beef, macaroni, kidney beans, and melted cheddar cheese for a satisfying meal.
- Top with extra shredded cheddar, sliced green onions, or fresh parsley if desired. Serve immediately while hot and enjoy the comforting blend of flavors.
Variations
- Extra-Cheesy Chili Mac: Add an additional ½ cup of shredded sharp cheddar for a creamier, richer dish.
- Spicy Jalapeño Chili Mac: Incorporate finely chopped jalapeños and a pinch of cayenne pepper to give it a bold, spicy kick.
- Three-Bean Chili Mac: Substitute some of the ground beef with black beans or pinto beans for added fiber and variety.
- Turkey Chili Mac: Use ground turkey instead of beef for a leaner, lighter version.
- Creamy Chili Mac: Stir in 2 tablespoons of cream cheese along with the cheddar to add extra creaminess.
- Tex-Mex Chili Mac: Mix in ½ cup of sweet corn and sprinkle taco seasoning for a southwestern twist.
Tips
- Always brown the ground beef before adding it to the slow cooker to enhance flavor and prevent a greasy texture.
- Drain excess fat from the beef and vegetables to keep the chili mac from becoming oily.
- Use low-sodium beef broth to control the salt level and adjust seasoning to taste.
- Add the elbow macaroni only in the final cooking stage to avoid mushy pasta.
- Stir the pasta occasionally as it cooks to prevent it from sticking to the slow cooker.
- If the chili mac thickens too much during cooking or resting, add a small amount of hot beef broth to loosen it up.
- Store leftovers in an airtight container in the refrigerator for up to 3 to 4 days. Reheat gently on the stove or in the microwave, stirring and adding a splash of broth or water to restore moisture.
- For longer storage, freeze the chili base without pasta for up to 2 months. Thaw and add freshly cooked macaroni and cheese when ready to serve to maintain texture.
- To preserve the sharp cheddar’s flavor, shred cheese fresh rather than using pre-shredded varieties.
- Avoid leaving the finished chili mac on the warm setting for extended periods, as the pasta will continue to soften and may become mushy.