Skip to content
Instructions:
- Prepare your slow cooker by lightly greasing the insert or using a slow cooker liner to prevent the nuts from sticking during cooking.
- Combine the pecan and walnut halves in a large mixing bowl, then pour the maple syrup over them. If using cinnamon or vanilla, mix these into the syrup before coating the nuts to ensure even flavor distribution.
- Toss the nuts gently with a silicone spatula until each piece has a glossy, even coating of maple syrup without excess pooling at the bottom of the bowl.
- Transfer the coated nuts into the slow cooker and spread them out evenly in a single layer to promote consistent cooking and glazing.
- Cover the slow cooker with its lid and set it to the LOW setting. Cook for 30 minutes to allow the syrup to warm and start reducing.
- Remove the lid carefully, stir the nuts to bring those from the bottom to the surface, and check that the syrup is thinning before it begins to concentrate.
- Replace the lid and continue cooking, stirring every 20 to 30 minutes to prevent scorching and to ensure all nuts get evenly coated.
- After about one hour, if your slow cooker design allows, position the lid slightly ajar to let steam escape. This step helps the maple syrup concentrate rather than remain watery.
- Continue cooking for another 45 to 60 minutes, stirring regularly and watching closely during the last half hour to avoid burning the syrup.
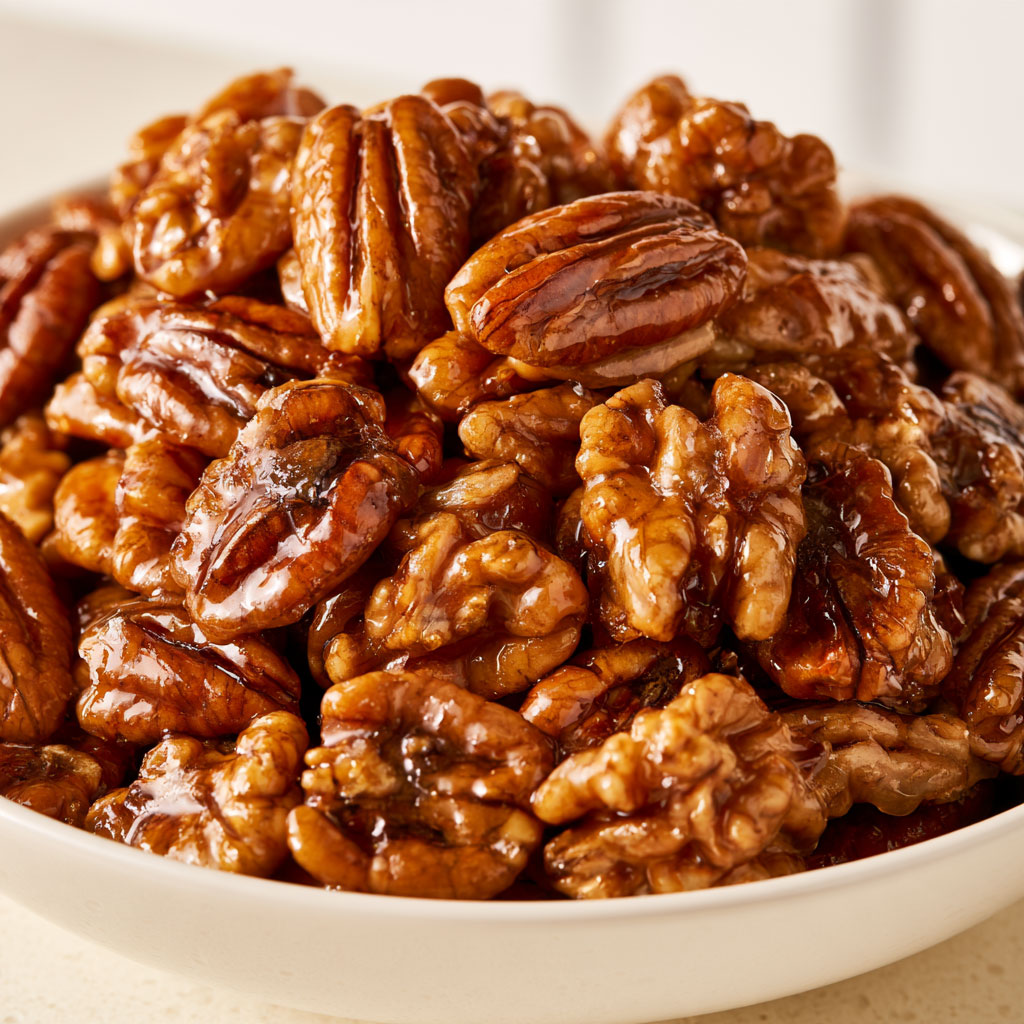
- The candied nuts are done when they have a deep golden-amber color, a shiny glaze that clings to the nuts, and when the pecans and walnuts retain their natural shapes without excessive pooling of syrup.
- Turn off the slow cooker and immediately transfer the hot nuts onto a parchment-lined baking sheet, spreading them into a single layer using a silicone spatula.
- Separate any large clusters gently while the glaze is still warm, but avoid touching the hot syrup directly to prevent burns.
- Let the nuts cool completely for about 30 minutes or longer if needed. The glaze will set into a glossy, lightly crisp coating rather than a thick shell.
- Once cooled, break apart any clusters that formed during cooking, leaving a few small clusters intact for an attractive homemade look.
- If desired, sprinkle a tiny pinch of flaky sea salt over the nuts while the glaze is still slightly tacky to enhance the flavor.
- Serve immediately or package once fully cooled for gifting or storage.
Variations
- Add ½ teaspoon ground cinnamon and ¼ teaspoon vanilla extract to the maple syrup before coating the nuts for a warm, traditional holiday flavor.
- Sprinkle a pinch of cayenne pepper along with cinnamon for a sweet and spicy kick perfect for festive occasions.
- Use only pecans or walnuts if you prefer one nut flavor over the mixed combination, adjusting quantities accordingly.
- Substitute pure maple syrup with honey or agave nectar for a different natural sweetness and glaze texture, though cooking times may vary.
- For a classic crunchy sugar crust, use a separate recipe with granulated or brown sugar instead of maple syrup, as maple creates a lighter glaze.
- Mix in chopped dried cranberries or orange zest after cooling for added color and citrus notes in your candied nuts.
Tips
- Store candied nuts in airtight containers in a cool, dry place to maintain texture and flavor. They keep well for about 5 to 7 days at room temperature.
- If your kitchen is warm or humid, refrigerate the nuts in an airtight container to prevent the glaze from becoming sticky; refrigerated nuts keep for up to 2 weeks.
- For longer storage, freeze the cooled nuts in airtight, freezer-safe containers for up to 2 months. Allow them to return to room temperature before opening to avoid condensation.
- Use large, fresh pecan and walnut halves to create a visually appealing contrast and better texture compared to smaller chopped pieces.
- Stir the nuts regularly during cooking to prevent scorching and to ensure an even, glossy glaze.
- Transfer the nuts to the parchment-lined baking sheet immediately after cooking to cool; this helps the glaze set properly and prevents sticking.
- Avoid touching the hot maple coating directly as it can cause burns; use a spatula to separate clusters while warm.