Skip to content
Instructions:
- Start by lining a large baking sheet with parchment or wax paper to prevent sticking and make cleanup easier.
- Combine the creamy peanut butter and softened unsalted butter in a large mixing bowl. Beat them with a hand mixer for 1 to 2 minutes until the mixture is smooth, creamy, and fluffy; this aeration is key for a light texture.
- Add the vanilla extract and optional salt, mixing thoroughly to enhance flavor depth and balance sweetness.
- Gradually incorporate the sifted powdered sugar, about half a cup at a time, mixing well after each addition. Adding sugar slowly ensures the filling doesn’t become dry or crumbly while achieving the perfect consistency.
- Continue mixing until the filling is thick and firm enough to roll into balls without sticking excessively to your hands. If the mixture feels too soft, refrigerate it for 10 to 15 minutes to firm it up before shaping.
- Using a small cookie scoop or measuring spoon, portion out approximately one tablespoon of filling per ball.
- Roll each portion gently between your palms to form smooth, round balls about 1 inch in diameter, ensuring uniform size for even coating and presentation.
- Place the peanut butter balls on the prepared baking sheet, spacing them slightly apart to prevent sticking during chilling.
- Chill the balls in the refrigerator for about 30 minutes until firm enough to dip without losing their shape.
- While chilling, prepare the chocolate coating by combining semisweet chocolate chips and vegetable shortening (or refined coconut oil) in a microwave-safe bowl.
- Microwave the chocolate mixture in 20-second intervals, stirring thoroughly between each to avoid overheating and ensure a smooth, glossy finish.
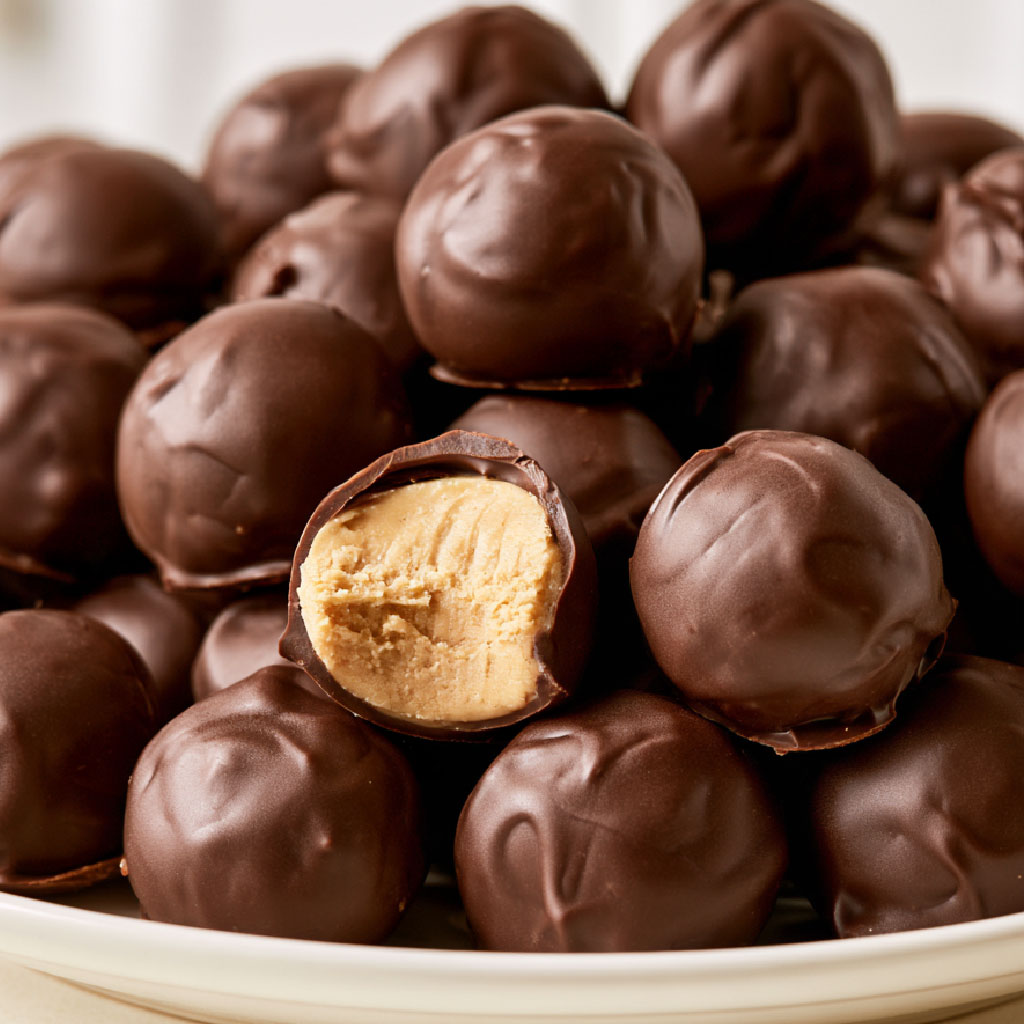
- Dip one chilled peanut butter ball at a time into the melted chocolate using a dipping fork, turning it gently to coat completely.
- Lift the coated ball from the chocolate, allowing excess to drip back into the bowl to avoid thick, uneven shells.
- Place the coated balls back onto the parchment-lined baking sheet and repeat until all balls are covered.
- Refrigerate the finished candies for 20 to 30 minutes to let the chocolate harden into a delicate, firm shell.
- Once set, transfer the peanut butter balls to a decorative tin or serving platter, keeping them refrigerated until serving for the best texture and freshness.
Variations
- Classic Buckeye Style: Dip the balls partially so a small circle of peanut butter filling remains visible at the top for a traditional look.
- White Chocolate Coating: Substitute semisweet chocolate with white chocolate melting wafers for a sweeter, creamier shell.
- Dark Chocolate Version: Use dark chocolate instead of semisweet for a richer, less sweet contrast to the peanut butter center.
- Crunchy Texture: Replace creamy peanut butter with crunchy peanut butter to add a pleasant nutty crunch inside.
- Chocolate Drizzle Decoration: After the coating sets, drizzle melted contrasting chocolate (white or dark) over the tops for a festive touch.
Tips
- Use conventional creamy peanut butter for reliable texture; natural peanut butter can separate and may require stirring and recipe adjustments.
- Ensure butter is softened but not melted to achieve the ideal filling consistency.
- Sift powdered sugar before mixing to avoid lumps and ensure a smooth filling.
- Roll peanut butter balls into uniform sizes for consistent dipping and a professional appearance.
- Chill the peanut butter balls thoroughly before dipping to prevent melting and help maintain their round shape.
- Heat the chocolate slowly and stir frequently to avoid scorching and maintain a glossy coating.
- Store finished peanut butter balls in an airtight container in the refrigerator for up to two weeks; separate layers with parchment paper to prevent sticking.
- For longer storage, freeze candies in a freezer-safe container for up to two months, thawing overnight in the refrigerator before serving.
- Keep peanut butter balls cool when gifting and avoid prolonged exposure to warm temperatures to preserve the chocolate shell’s firmness.