Skip to content
Instructions:
- Combine the flour, instant yeast, sugar, and salt in a large bowl, mixing gently to evenly distribute the dry ingredients.
- In a separate bowl, whisk together the warm milk, warm water, melted butter, and egg until smooth and fully blended.
- Ensure the milk and water are warm but not hot (ideally 105–110°F) to avoid killing the yeast, which is essential for the dough to rise properly.
- Pour the wet ingredients into the dry mix and stir with a sturdy spoon or spatula for 2 to 3 minutes until a soft, sticky dough forms with no dry flour remaining.
- The dough should look shaggy and sticky, not smooth or elastic; resist adding extra flour because moisture is key to soft, fluffy rolls.
- Cover the bowl loosely with plastic wrap or a clean towel and place it in a warm, draft-free spot to rise for 60 to 75 minutes until doubled in size.
- After rising, gently fold the dough with a spatula to release some air, being careful not to deflate it completely.
- Lightly grease a 9×13-inch baking dish and dust your hands and work surface with flour to handle the sticky dough without kneading.
- Turn the dough onto the floured surface and divide it into 15 equal pieces using a bench scraper or floured knife.
- Shape each piece into a smooth ball by folding edges underneath and pinching the bottom; use minimal flour on your hands to avoid drying out the dough.
- Arrange the dough balls in the baking dish in three rows of five, leaving small spaces between them for expansion.
- Cover the dish loosely with a towel or lightly greased plastic wrap and let the rolls rise again for 35 to 45 minutes until puffy and nearly doubled.
- Preheat the oven to 375°F during the last 15 minutes of the second rise.
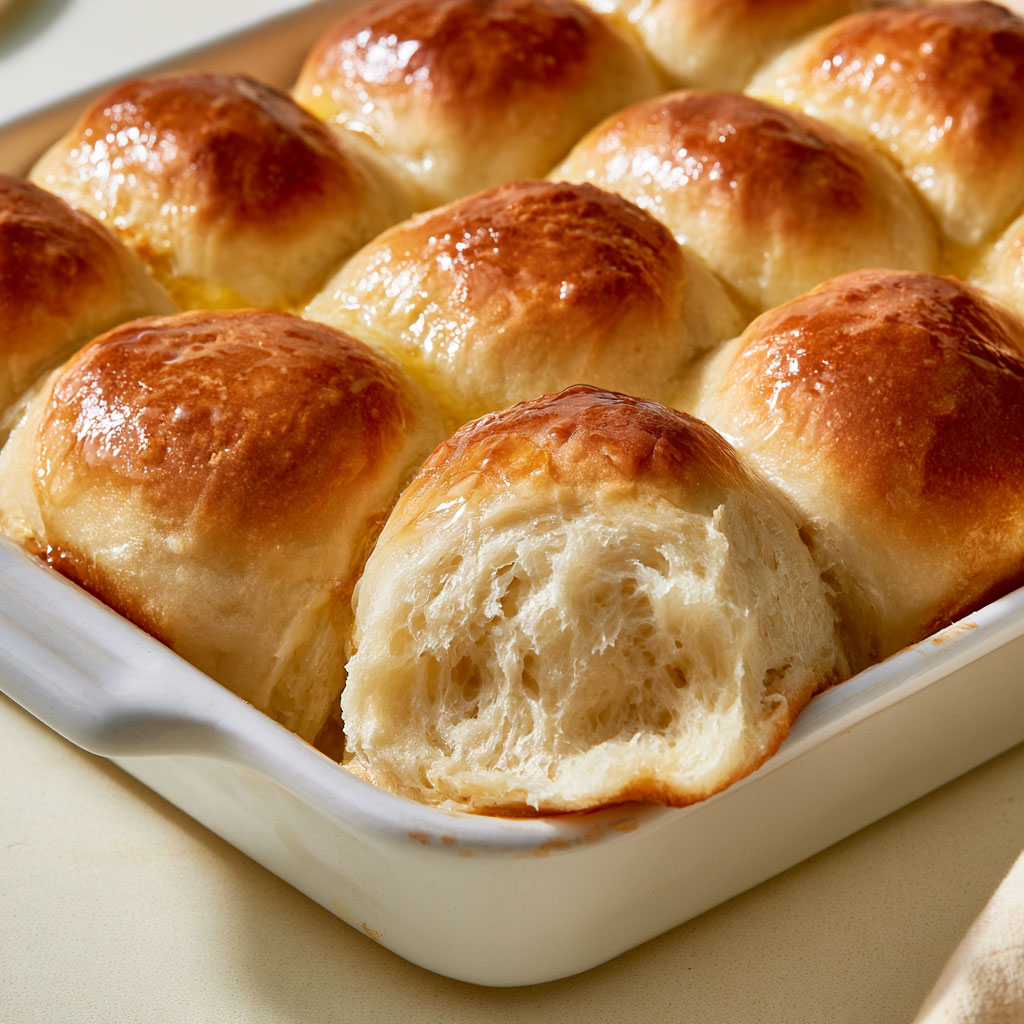
- Remove the cover carefully without pressing down on the dough and bake the rolls on the middle oven rack for 20 to 25 minutes until golden brown on top.
- Monitor the rolls near the end of baking; if they brown too fast, tent with foil to prevent burning while the centers finish baking.
- Check that the internal temperature reaches about 190°F, ensuring the rolls are fully cooked and not doughy inside.
- Immediately brush the hot rolls generously with melted butter, which soaks into the tops and between the rolls for a rich, buttery finish.
- Sprinkle flaky sea salt over the warm rolls if desired, enhancing the buttery flavor with a slight crunch.
- Let the rolls rest in the pan for 5 to 10 minutes before serving to set the texture and make handling easier.
- Serve the rolls warm, either directly from the baking dish or separated gently to showcase their soft, airy crumb and golden tops.
Variations
- Substitute half of the all-purpose flour with bread flour for a chewier texture with a bit more structure.
- Add 1 to 2 teaspoons of garlic powder or finely minced fresh herbs like rosemary or thyme to the dough for savory flavor twists.
- Brush the tops with an egg wash (beaten egg with a splash of water) instead of butter before baking for a shinier, deeper golden crust.
- Mix in ¼ cup of grated Parmesan cheese into the dough for cheesy dinner rolls that pair well with Italian dishes.
- Replace whole milk with buttermilk or yogurt to add a subtle tang and tender crumb to the rolls.
- For a slightly sweet version, fold in ¼ cup of honey or maple syrup with the wet ingredients before mixing.
Tips
- Store leftover rolls in an airtight container at room temperature for up to 2 days to maintain softness.
- For longer storage, freeze fully cooled rolls in a freezer-safe bag for up to 3 months; thaw at room temperature before reheating.
- Reheat rolls by wrapping them in foil and warming in a 300°F oven for 10-15 minutes to restore freshness and softness.
- Avoid over-flouring the dough during shaping, as this will dry out the rolls and reduce their characteristic fluffiness.
- If your kitchen is cool, extend rising times or use a warm (but turned-off) oven as a proofing spot to ensure proper dough fermentation.
- Brush the rolls with melted butter immediately after baking to lock in moisture and add a rich, golden finish.
- When shaping, handle the dough gently to preserve the air bubbles that create the light, airy texture inside each roll.