Skip to content
Instructions:
- Start by mixing the flour, salt, and instant yeast in a large bowl until evenly combined.
- Slowly pour in 1½ cups of lukewarm water (around 80–90°F or 27–32°C) and stir with a wooden spoon until all the flour is hydrated and a rough, sticky dough forms.
- Scrape down the sides of the bowl so no dry flour remains. Cover the bowl tightly with plastic wrap or a reusable cover.
- Leave the dough at room temperature (ideally 68–72°F or 20–22°C) to rise undisturbed for 12–18 hours. Cooler kitchens may require a longer rise, while warmer ones need less time.
- The next morning, the dough should have expanded with bubbles visible on the surface and feel soft and airy.
- Dust a work surface lightly with flour, then gently transfer the sticky dough onto it without deflating the air bubbles.
- With floured hands, fold the dough inward from each side to form a loose round shape, then flip it seam side down.
- Shape the dough gently by cupping your hands around it and pulling it towards you to create surface tension, being careful not to press out the air.
- Place a piece of parchment paper dusted with flour or cornmeal on a baking sheet or board, then set the shaped dough on it.
- Cover the dough loosely with a kitchen towel or inverted bowl and let it rest for 30–45 minutes while you preheat the oven.
- Preheat your oven to 450°F (232°C) with a Dutch oven and lid inside for at least 30 minutes to ensure the pot is thoroughly heated.
- Just before baking, score the top of the dough with a sharp knife or bread lame to allow controlled expansion during baking.
- Carefully remove the hot Dutch oven from the oven, lift the lid, and, using the parchment paper, transfer the dough into the pot.
- Replace the lid and return the Dutch oven to the oven. Bake covered for 30 minutes to trap steam and create a moist environment for crust development.
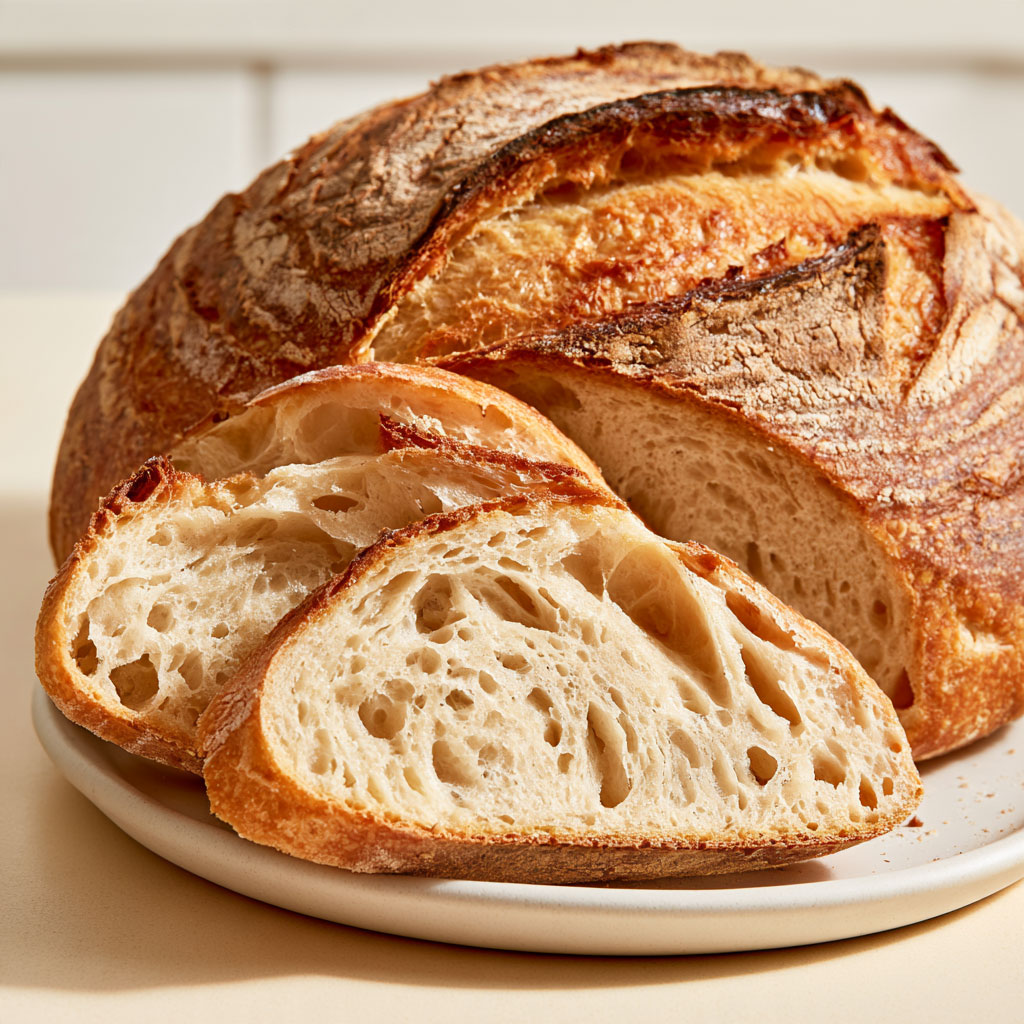
- After 30 minutes, remove the lid and continue baking uncovered for an additional 12–18 minutes, until the crust is a deep golden brown and crisp.
- Use an instant-read thermometer to check the loaf’s internal temperature; it should register about 205–210°F (96–99°C) when fully baked.
- Remove the bread from the Dutch oven and transfer it to a wire rack to cool for at least 45–60 minutes before slicing. This allows the crumb to set and prevents gumminess.
- Slice with a serrated bread knife and serve slightly warm, ideally with softened butter and your Thanksgiving favorites.
Variations
- Substitute half the all-purpose flour with whole wheat flour for a nuttier flavor and denser crumb.
- Add 1 tablespoon of honey or maple syrup to the dough for a subtly sweet crust and enhanced browning.
- Incorporate herbs like rosemary or thyme into the dry ingredients for a fragrant, savory twist.
- Top the loaf with seeds such as sesame, poppy, or sunflower before baking for extra texture and flavor.
- Use bread flour instead of all-purpose to increase gluten development, resulting in a chewier texture.
- For a softer crust, remove the bread from the oven and cover loosely with a clean kitchen towel during cooling.
Tips
- Store the cooled bread in a paper bag or wrapped loosely in a kitchen towel on the counter for 1 day to keep the crust crisp.
- For longer storage, place the bread in an airtight container or plastic bag at room temperature for up to 2–3 days; note the crust will soften.
- Freeze sliced bread in a freezer-safe bag for up to 2–3 months and toast slices directly from the freezer to enjoy fresh bread anytime.
- Reheat stale bread in a 350°F (175°C) oven for 8–10 minutes to refresh crust crispness and warm the crumb.
- Avoid adding extra flour during shaping; a slightly sticky dough helps create an open, airy crumb structure.
- Adjust fermentation time based on your kitchen temperature: a warmer environment shortens rising time, while cooler conditions extend it.
- Allow the bread to cool fully before slicing to prevent a gummy texture inside and to enhance flavor development.