Skip to content
Instructions:
- Preheat your oven to 400°F (200°C). Wash the sweet potatoes and pierce them several times with a fork to allow steam to escape during roasting.
- Place the sweet potatoes on a parchment-lined baking sheet and roast for 45 to 60 minutes until they are completely tender and easily pierced with a fork. Let them cool enough to handle safely.
- Lower the oven temperature to 350°F (175°C). Peel the sweet potatoes carefully and transfer the flesh to a large mixing bowl.
- Mash the sweet potato flesh thoroughly until you have about 2 cups of smooth, creamy mashed sweet potatoes for the filling.
- Fit your unbaked 9-inch pie crust into a pie dish, pressing gently against the bottom and sides, then crimp the edges for a classic pie look.
- Brush the inside bottom of the crust with 1 tablespoon of melted butter, then evenly sprinkle ¼ cup brown sugar over it. This step adds a rich caramel-like layer beneath the filling.
- In a large bowl, combine the mashed sweet potatoes with the softened butter. Beat with an electric mixer for 2 to 3 minutes until the mixture becomes smooth and fluffy.
- Add both the light brown sugar and granulated sugar to the bowl, mixing well to fully incorporate the sugars into the filling.
- Pour in the lightly beaten eggs, evaporated milk, and vanilla extract, mixing gently to create a rich, silky filling.
- Stir in the ground cinnamon, nutmeg, ginger, salt, and optional orange zest until the spices are evenly distributed throughout the mixture.
- For a bakery-style smooth texture, beat the filling an additional minute or pass it through a fine-mesh sieve to remove any fibrous bits.
- Pour the filling into the prepared pie crust, spreading it evenly with a spatula and smoothing the surface.
- Bake the pie on the middle oven rack for 50 to 60 minutes, until the edges are set but the center still has a slight wobble. If the crust edges brown too quickly, cover them loosely with foil to prevent burning.
- Remove the pie from the oven and cool it completely on a wire rack for at least 2 hours to allow the filling to firm up and develop a custard-like texture.
- For clean, neat slices, refrigerate the pie for another 1 to 2 hours before serving.
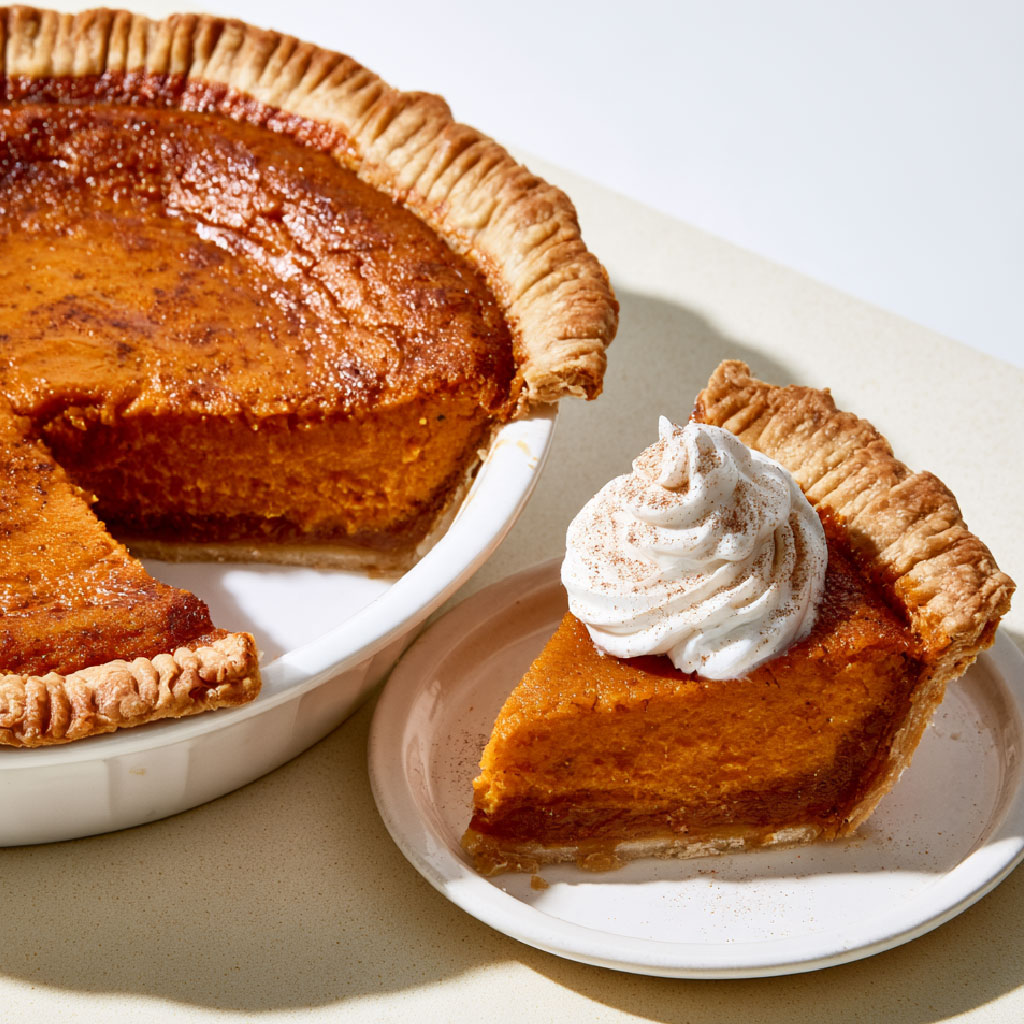
- Slice into 8 generous wedges to reveal the deep orange filling and golden flaky crust.
- Serve the pie at room temperature or slightly chilled, topped with a dollop of freshly whipped cream and a light sprinkle of cinnamon if desired.
Variations
- Use half-and-half instead of evaporated milk for a richer, creamier filling similar to Patti LaBelle’s original version.
- Add a splash of bourbon or rum to the filling for a subtle warm flavor that complements the spices.
- Incorporate chopped pecans or walnuts into the filling or sprinkle on top before baking for added texture and nuttiness.
- Swap out the pie crust for a graham cracker crust to give the pie a different crunchy base and a hint of sweetness.
- Replace the orange zest with lemon zest or omit citrus entirely if you prefer a more traditional spice-forward pie.
- For a vegan version, substitute the eggs with flax eggs and use a dairy-free butter alternative along with coconut or almond milk instead of evaporated milk.
Tips
- Roast sweet potatoes until very tender to ensure the smoothest filling; undercooked potatoes will create lumps.
- Beat the filling thoroughly to achieve a light, fluffy texture that mimics bakery-style pies.
- Cover pie crust edges with foil during baking if they start to brown too fast, preventing overbrowning while the filling finishes cooking.
- Allow the pie to cool fully at room temperature before refrigerating to help the custard set properly and maintain its texture.
- Store leftover pie covered in the refrigerator for up to 4 days to maintain freshness and flavor.
- Reheat individual slices gently in the microwave or oven for a warm serving, or enjoy chilled with whipped cream.
- Make the pie a day ahead and refrigerate overnight for best flavor development and easier slicing.